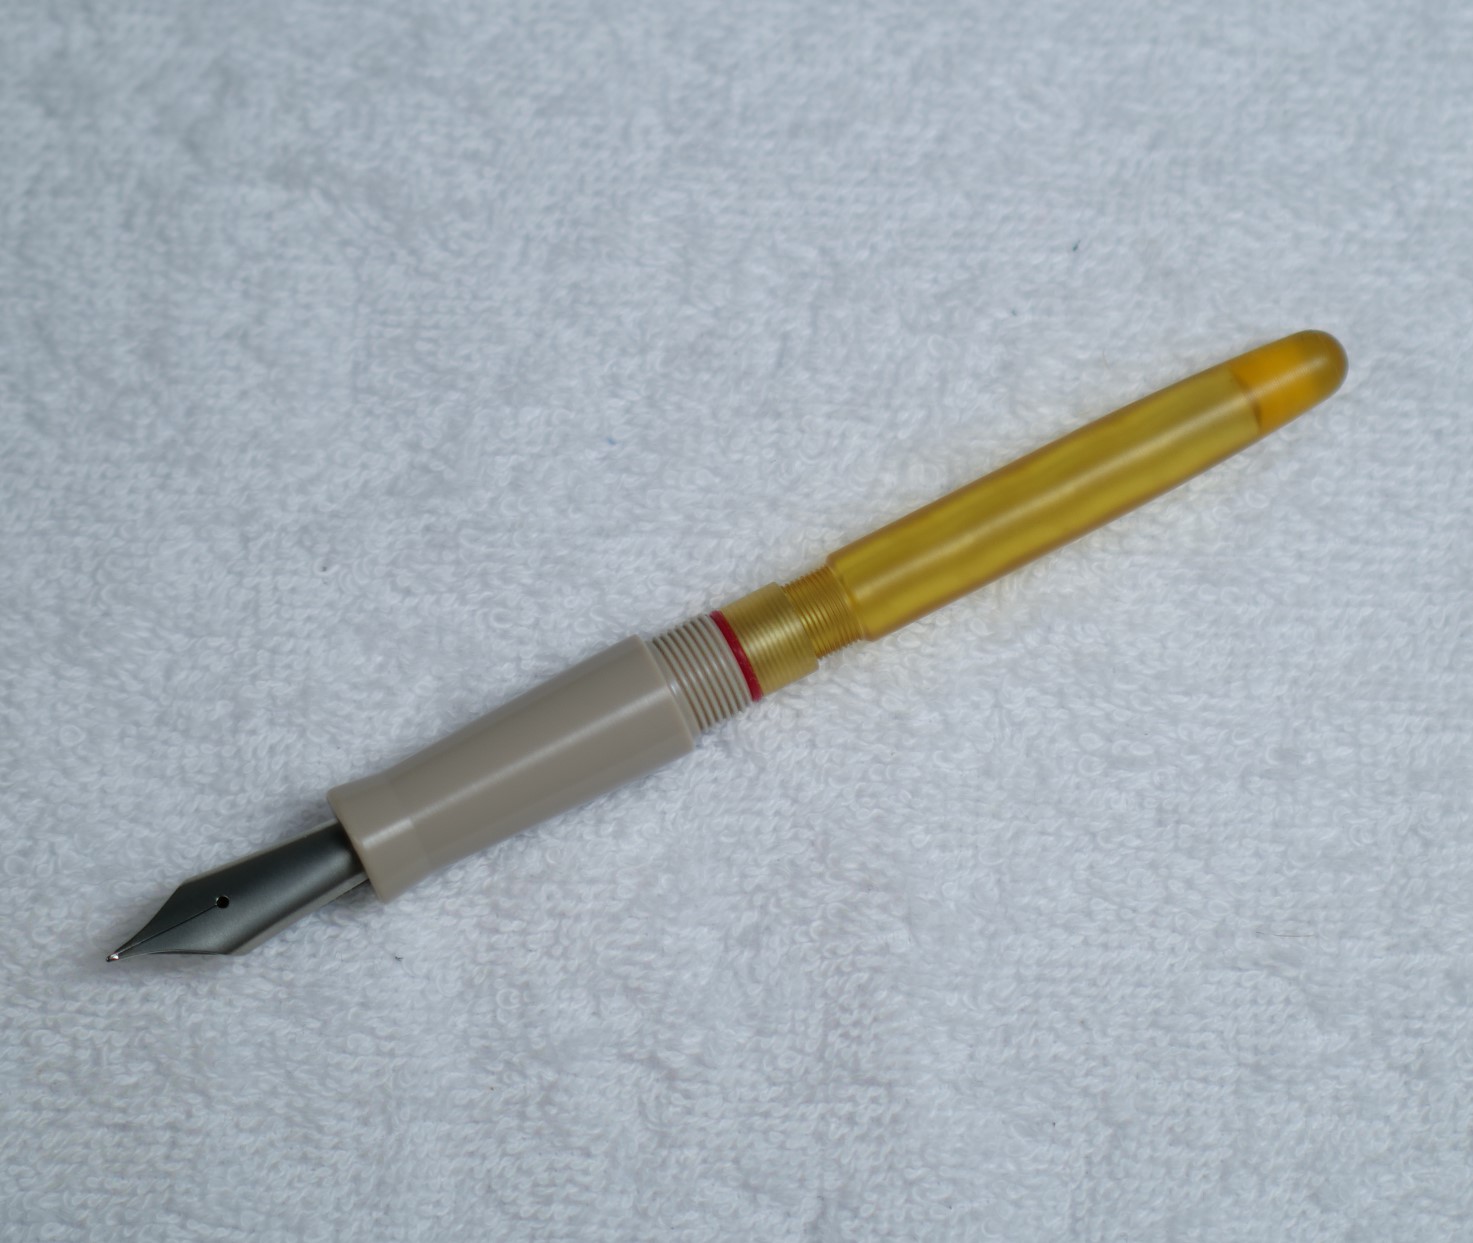
Reusable Ultem Ink Cartridge has been developed !
So far, the only ink storage options were: Pilot Con-70, Con-40, or eye-dropper style.
There has been some feedback regarding ink seeping out between converter / grip section.
It is still not 100% clear, but I think the cause of this problem arrises from the injection moulding parting line, as can be seen below (* an O-ring was added to help overcome this issue):
This phenomenon may happen to some Con-70, it seems that there are some small variations for Con-70. They are not made 100% indentically.
The below Con-70 has been used a lot.
You can see barely the parting line almost at the top (because it doesn't engage hard as the area below)
The area where the engagement is hardest, the parting line has completely worn down.
This converter doesn't have any issues with leaking.
Because the clear plastic of the Con-70 is created by injection moulding,
the two halves of the moulds inevitably creates a parting line.
If the plastic part was precision machined, there shouldn't be any issues with our grip section.

So, when the ultem ink cartridge was planned, I knew the ink seeping problem wasn't going to happen,
because both inside of the grip section and the ultem ink cartridge are precision machined.
however, I wanted an extra protection mechanism, that will prevent any unexpected ink leak / seeping out.
* precision of critical areas: ± 0.025mm
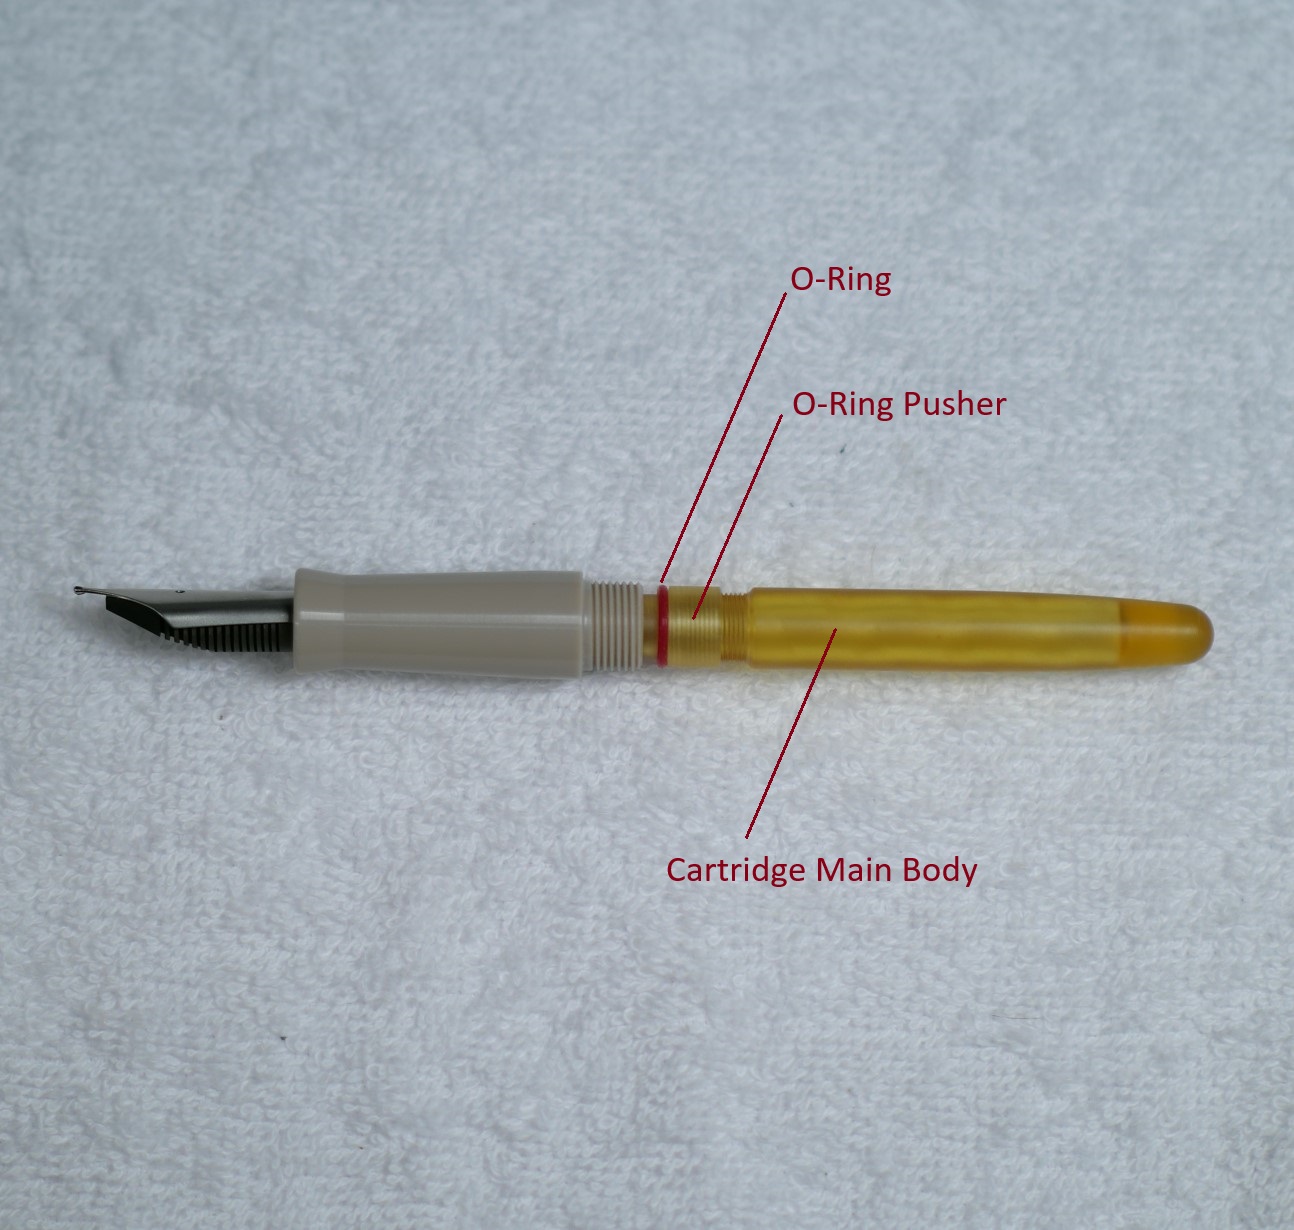
the ultem ink cartridge is comprised of three parts, as can be seen below:
1) the body
2) O-ring pusher
3) O-ring
I did my best to make sure the ultem ink cartridge will last very long.
The wall thickness of the ultem is quite thick, and the material itself is very robust material and high quality.
It will be very durable in terms of both mechanically and chemically.
* Max ink fill line (below picture), you can go over it, but be careful as it could overflow !
* Max capacity:
1.0 ml @ max ink fill line
1.3 ml @ topped up
* Inside the cartridge there's an internal helix pattern.
This internal helix pattern facilitates ink to flow down to the opening

the three parts are assembled like this:

when the O-ring pusher is turned,
depending on the direction it is turned, the O-ring pusher will move forward or backward.
when the O-ring pusher moves forward, it will also move the O-ring forward.
eventually the O-ring will compress against the end of the grip section.
*Only a light force is needed, you will be able to feel the light resistance. Do not apply too much force!

◆ How to use:
1) move to O-ring & O-ring pusher to rear position (doesn't have to be all the way back)
2) insert cartridge (fill the cartridge with a syringe / eyedropper)
* always rotate the cartridge a little bit while installing / removing the cartridge, for smoother movement
* try to be as smooth as possible, avoid jerky movement
(jerky movement can induce ink spurting @ heart hole, if there's ink inside the feeder before installation. So when inserting the cartridge place the heart hole towards a piece of tissue, just in case it might spurt a bit of ink)
3) As you push in the cartridge, resistance will increase.
Do not try to insert the cartridge all the way!
You can stop at a certain resistance level that you will comfortable with
* It needs some resistance level, not too loose)
4) Rotate the O-ring pusher counter-clockwise to push the O-ring against the end area of the grip section.
Only a light pressure is needed for seal engagement. High pressure will squeeze the O-ring outward, and that can interfere with smooth installation of the barrel into grip section thread.
5) For filling the cartridge, use a syringe or spoid / eye-dropper.
*** when filling ink, you must aim at the inner wall of the cartridge and inject slowly. If you don't follow these, ink will not be able to flow down the wall, and ink will get stuck and spill out from the opening hole.
6) For cleaning, fill it up with tap water then close the lid with your finger. shake it back and forth, then remove water by shaking it again. repeat the process until it is clean.
7) If you want to remove the ink inside the cartridge, open the ink bottle then place the pen above it (nib down). slowly rotate and pull the cartridge until ink starts to drip down. when most of the ink is gone, remove residual ink by dapping the nib on the edge of the bottle opening.
* I recommend not removing the ink cartridge while it is full of ink.
If you have to remove it, you have to do the following:
When removed, ink on both grip section inside area & cartrige outside area must be wiped with tissue.
(this is because when you reinstall the cartridge (while the inside & outside walls are inked), that ink can get pushed out, which could cause contamination.
So for cleaner operation, I recommend you to use the ink all the way.
However, if you don't mind a cleaning up with a tissue, then there's no problem.
* I recommend you to fill @ max ink fill line (capacity 1.0ml).
however, if you are experienced and feel confident with filling all the way up (capacity 1.3ml),
then, it is upto your decision.
* If the pen is new, or the feeder is completely dried out, you may experience initial ink flow issues.
The easiest way is to give the pen a bit of shake until ink flows out.
Another way is loosening up the ultem cartridge (with ink in it), so the ink will drip down. don't loosen up too much because a lot of ink will flow down fast.
A third way is to inject ink with a syringe directly to the tail(end) of the feeder, before installing the cartridge.
through this research, I successfully developed an In-House ink storage mechanism.
I am happy to present you this contraption, and it will be on sale very soon.
I have learned a lot from this project, and it will help us develop new contraptions in the future.
thank you!


